Automated Embedded twitch video iframe

If you host your website on a Linux server, and have SSH access to your website then you can create an automated embedded twitch video iframe that shows your twitch channel, or who you’re hosting.

This is a simple way to support people on twitch. Plus if your website gets more views than your twitch channel then it could make a big difference.

Now I believe all browsers mute iframes automatically. To count as views the video has to be manually unmuted by the person using your website.

Setup autohosting on your twitch account.

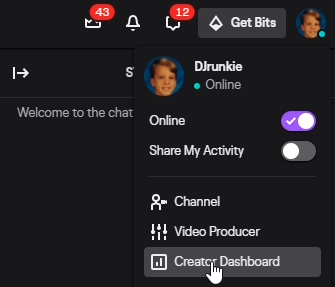
Login to twitch, click on your user icon in the upper right, click on Creator Dashboard.

On the dashboard click on Preferences, and then Channel.

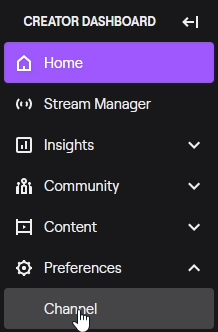
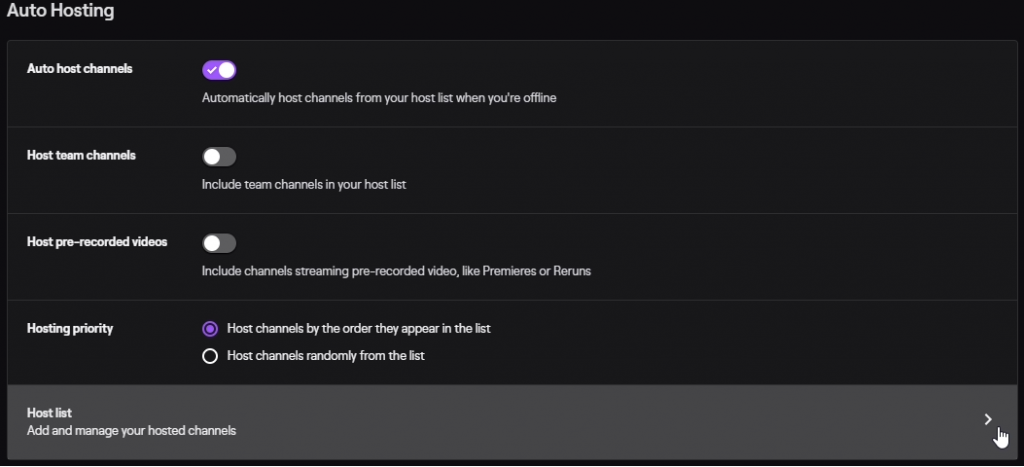
Scroll down to Auto Hosting.
Enable auto host channels, and then click on Host list. Add who ever you want to your Host list.

Create an app on dev.twitch.tv

Goto https://dev.twitch.tv/login and use your twitch credentials to login, then click on Your Console.

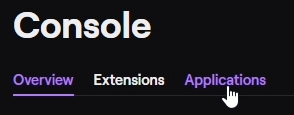
Click on Applications.

Click on Register your Application

Enter a unique name for your application
Enter http://localhost for the OAuth Redirect URL
Choose any category, I’m using “Website Integration”

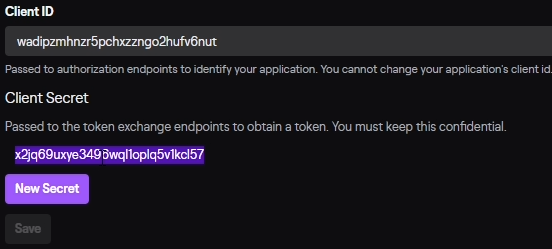
Click on the “Manage” button on your new application.
Copy your Client ID to a notepad
Ask for a New Secret and copy that as well.

Open command prompt in Windows, or terminal in Linux and ssh into your server / website. If you’re using Windows SSH must be enabled for command prompt in Windows.

I’ve made the following code available here for easier copy and pasting. https://disc4life.com/embeddedtwitchiframe.txt

Modify this curl command using the client_id and client_secret from the step above, then run the curl request.

curl -X POST 'https://id.twitch.tv/oauth2/token?client_id=wadipzmhnzr5pchxzzngo2hufv6nut&client_secret=x2jq69uxye3496wql1oplq5v1kcl57&grant_type=client_credentials'
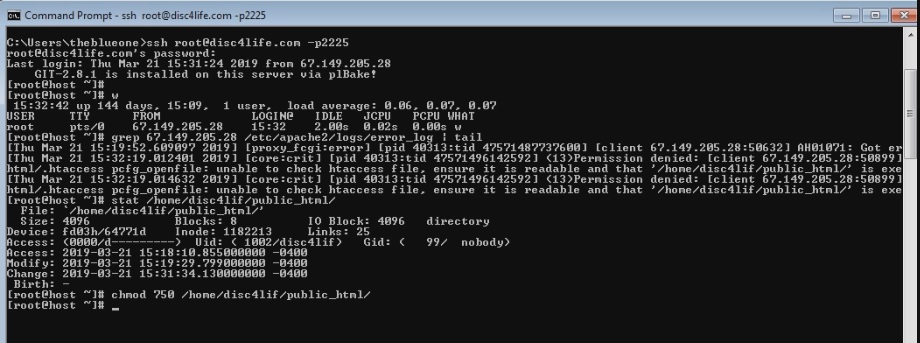
Note: I do recommend using the website user when logging in via SSH. I was lazy, and used root. If you’re not familiar with permissions then use the website user. In this case the website user would have been disc4lif

The access token, which is your OAuth ID, expires in about 2 months.
Now we take this information to get your channel id from the twitch API.

Modify this curl command with your client id, and the access token you just received.
Modify the login with your twitch name. If login=DJrunkie is not changed then you will just get the information for my channel from the twitch api.

 curl -H 'Client-ID: wadipzmhnzr5pchxzzngo2hufv6nut' -H 'Authorization: Bearer ezf7id5004m7gzz452770ha7y4oiw1' -X GET 'https://api.twitch.tv/helix/users?login=DJrunkie'

Now use the channel ID to make a request checking if we are streaming, or if we are currently hosting someone. Again replace the client id, and access token. Then replace host=27941300 with your channel ID.

curl -H 'Client-ID: wadipzmhnzr5pchxzzngo2hufv6nut' -H 'Authorization: Bearer ezf7id5004m7gzz452770ha7y4oiw1' -X GET 'https://tmi.twitch.tv/hosts?include_logins=1&host=27941300'

The top line of output is if were hosting someone, the bottom is if were streaming.

Note: Twitch will not embed video on an http site. You must have an SSL installed and use https:// on your website

And with this info we can now create a script to update an iframe on our website.
This will show an iframe on https://disc4life.com/hostingexample/index.php

vim public_html/hostingexample/index.php

<p align="left">Give my friends on twitch a view!</p>

<iframe src='https://player.twitch.tv/?channel=tedster009&enableExtensions=true&muted=false&parent=disc4life.com&parent=www.disc4life.com&player=popout&volume=.00001' frameborder="0" allowfullscreen="true" scrolling="no" height="600" width="1066"></iframe>

This will show an iframe on https://disc4life.com/hostingexample/news.php

vim public_html/hostingexample/news.php

<h3 align="center">Give my friends on twitch a view!</h3>
<p align="center"> 
<iframe src='https://player.twitch.tv/?channel=tedster009&enableExtensions=true&muted=false&parent=disc4life.com&parent=www.disc4life.com&parent=vpn.disc4life.com&player=popout&volume=.00001' frameborder="0" allowfullscreen="true" scrolling="no" height="300" width="525"></iframe> 
</p>

Note: For text editing in SSH use nano if you prefer. The text editor vim can be confusing if you’re not familiar with it.

Change channel=tedster009 to whose channel you want.
Replace disc4life.com&parent=www.disc4life.com&parent=vpn.disc4life.com with your website names.
Change the height and width to what you prefer, some 16:9 ratio, this is in pixels.

This script will update the index.php iframe with who you’re currently hosting, or your name if you’re streaming.

Modify all /home/disc4lif/public_html/hostingexample/ directory paths here with the full path to the website files the script will be updating.

Update nhosting= and istream= with your last the curl command
Update cname=djrunkie with your channel name.

vim /home/disc4lif/twitchcheck.sh

#!/bin/bash
#check for the iframe line from the file were updating, and cut out the text were interested in changing
chosting=$(grep iframe /home/disc4lif/public_html/hostingexample/index.php | cut -f3 -d= | cut -f1 -d\&)

#check the twitch api to see if this information has changed
nhosting=$(curl -H 'Client-ID: wadipzmhnzr5pchxzzngo2hufv6nut' -H 'Authorization: Bearer ezf7id5004m7gzz452770ha7y4oiw1' -X GET 'https://tmi.twitch.tv/hosts?include_logins=1&host=27941300' | cut -f14 -d\")

#we also need to check the twitch api to see if we are streaming.
istream=$(curl -H 'Client-ID: wadipzmhnzr5pchxzzngo2hufv6nut' -H 'Authorization: Bearer ezf7id5004m7gzz452770ha7y4oiw1' -X GET 'https://tmi.twitch.tv/hosts?include_logins=1&host=27941300' | cut -f6 -d\")

#our channel name
cname=djrunkie

#If were currently streaming, and the chosting value does not equal our twitch name, then update chosting with our twitch name in our files.  Otherwise if chosting already = nhosting, or nhosting is blank then exit because either its already set, or were not hosting anyone currently.  Otherwise chosting needs to be updated with nhosting.
if [[ "$istream" = host_login ]] && [[ "$chosting" != "$cname" ]]
 then
 sed -i "s/channel=$chosting/channel=$cname/g" /home/disc4lif/public_html/hostingexample/index.php
 sed -i "s/channel=$chosting/channel=$cname/g" /home/disc4lif/public_html/hostingexample/news.php
  elif [[ "$chosting" = "$nhosting" ]] || [[ "$nhosting" = '' ]]
   then
   echo "They're the same dude, or nhosting was blank"
   exit
 else
 sed -i "s/channel=$chosting/channel=$nhosting/g" /home/disc4lif/public_html/hostingexample/index.php
 sed -i "s/channel=$chosting/channel=$nhosting/g" /home/disc4lif/public_html/hostingexample/news.php
fi

Create a script that grabs a new OAuthID token, and updates the token in the twitchcheck.sh file.

Modify both directory paths here with the full path to the twitchcheck.sh script.
Update ntoken= with your first curl command

vim newtoken.sh

#!/bin/bash

#get the current token from the twitchcheck script we just created
ctoken=$(grep -m 1 'Bearer' /home/disc4lif/twitchcheck.sh | cut -f4 -d\' | awk {'print $3'})

#get a new token using our client_id and client_secret from our twitch application
ntoken=$(curl -X POST 'https://id.twitch.tv/oauth2/token?client_id=wadipzmhnzr5pchxzzngo2hufv6nut&client_secret=x2jq69uxye3496wql1oplq5v1kcl57&grant_type=client_credentials' | cut -f4 -d\")

#replace the current token with the new token
sed -i "s/$ctoken/$ntoken/g" /home/disc4lif/twitchcheck.sh

Now make a crontab executing these scripts. The first one I run every five minutes. The second one I run once a month every month.

Replace /home/disc4lif/ with the path to your scripts.

crontab -e

*/5 * * * * sh /home/disc4lif/twitchcheck.sh
* 2 7 */1 * sh /home/disc4lif/newtoken.sh

Now you have an embedded twitch iframe video on your website that updates automatically according to if you’re streaming, or if you’re hosting someone.

Check out the video if you’re confused about any part of the process!

Free VPN with OpenVPN server!

I am hosting OpenVPN services now at https://vpn.disc4life.com which redirects to my new server at https://vpnshroud.com. You are welcome to setup an account and use the services for free at the moment. This is utilizing the OpenVPN server provided by https://openvpn.net/ .

Here is a video showing you how to connect to the service.

I have been using a VPN connection due to a routing issue to the servers I play games on. I have been receiving 2-20% packet loss on my normal connection. However when I connect to the VPN the packets get routed through the VPN server, and they take a different route to reach the game servers than if I was just using my ISP. This has solved my packet loss issues. Although the ping is increased by about 25, this is much better than massive packet loss.

If your ISP is the problem then a VPN won’t fix your packet loss issues. In my case it was some routing device along the route path my ISP had no control over that was having packet loss. This is why connecting to the VPN solved my packet loss issues.

There are other reasons to use a VPN as well. For instance if you’re in a country outside of the US, and VPN into a server hosted in the US this may allow you to use services based in the US region. Netflix is a common example of this. The US region generally has more options for content through Netflix than other regions do, and because of this many people use a US based VPN to connect to Netflix.

Using a VPN also encrypts your packets sent and received. This would provide protection if you were using a WiFi hotspot. If you connect to a public WiFi, even if they have a password associated with it, there is a chance someone could be sniffing your connection for data. But if you use a VPN while connected to the WiFi all that data gets encrypted and who ever is sniffing your data can’t decrypt it.

The server is using the AES-256-GCM cipher for the VPN tunnel.

I’ll be adding more features and making improvements to the site. Enjoy the free VPN service for now!

Fixing issues with large directories on Linux using EXT4 file system via regex

If you’re having slow website or server performance it may be due to a directory having too many files. Here is a youtube video showing this in action. https://youtu.be/OZXok1Nb7Yc

I created a test directory with 1.5 million files, and getting the directory listing takes over 5 minutes. This means anytime you interact with the directory it could have a 5 minute + delay.

This is often caused by errant crontab scripts that are writing a file to the directory every minute over years. Or perhaps an email script, or some type of plugin creating too many images.

To start we will want to goto the problem directory, and get a file listing. I would recommend doing this in a screen session because it may take some time, and if it takes too long your SSH session could timeout.

screen -S searchfiles

After starting the screen session use ls to get a directory listing.

ls -l

After this finally get some output you can use this command sequence to scroll up in the screen session. CTRL + A then hit ESC. Now you can use PGUP to scroll up to see the file names. Once you have the file names you will want to start removing them with rm -f command

rm -f filename.[1][0-9][0-9][0-9][0-9][0-9]

This says forcefully remove all files with filename.1 through filename.100000. The [0-9] is a regular expression for 0 through 9. The rm command can only handle about 100,000 expressions before it will fail.


After going through all the regex iterations, and removing the files you have intended, you will then want to shrink the directory. This is done by rsyncing the remaining files to a new directory, and then moving that new directory into place. If there are any ownership / permissions that need correcting do that as well.

I would recommend removing the old directory at this point as its just a huge directory that has a copy of the files, and is not needed. Make sure you use the full path when using rm -rf .

rm -rf /home/temp/testing.bak/

Now that you have this issue solved make sure you also solve what was creating these files. If its a crontab issue you can add this code to the end of the crontab script to prevent it from creating files.

> /dev/null 2>&1

I’ve seen this issue at least a hundred times, and sometimes the systems inodes will even be full from this type of issue. Full inodes will cause the Linux system to not work at all, and that issue needs to be solved as fast as possible. If you need to do a inode investigation use my previous article to check that. https://disc4life.com/blog/?p=138

If you found this useful consider subscribing on youtube, or following me on twitch and twitter https://twitch.tv/djrunkie and https://twitter.com/djrunkie

Failed disk Adaptec Raid Repair on a Rackmount server running Linux

If you have a failed disk on your Hardware Raid using Adaptec raid controller on your Linux server you can use these commands to get the RAID info so you can replace the correct disk. Here is a video showing this post in action. https://youtu.be/w6Qu4CUo7gI

First check which RAID card you have

lspci | grep -i raid

04:00.0 RAID bus controller: Adaptec Series 7 6G SAS/PCIe 3 (rev 01)

The lspci command shows the details of your PCI bus, and we are just checking for raid. This shows us we have an Adaptec raid controller.

Now we can use this command to check the configuration of the RAID.

/usr/StorMan/arcconf getconfig 1

The getconfig option with the arcconf command shows us the Raid level, the disks, their status, and their serial numbers. We need the serial numbers to identify which disk to replace. Since this is a rack mount server there is no need to take the server offline, we can simply slide out the drive bay, and replace it with the same size disk. Once replaced the new disk should be labeled with the new serial number. The RAID controller should automatically detect the new disk and start rebuilding the array.

We can also check the current status of the rebuild using this command.

/usr/StorMan/arcconf getstatus 1

Once the rebuild is completed the RAID will be in an optimal state.

If you needed to confirm which disk was bad before replacing it you can check the RAID controllers log to see which disk is causing the issue.

/usr/StorMan/arcconf getlogs 1 device tabular

If this helped you out consider subscribing on youtube, or following me on https://twitch.tv/djrunkie

Fix white page or blank screen issues on your wordpress site using wp_debug or debug.log via wp-config.php

Are you having issues with your wordpress site loading a white page, and nothing else. Then I would recommend checking the debug.log file to see what is occurring as it could be a simple php error.

Here is a video demonstrating this process. https://youtu.be/8OF-U2QIEhM

First open your wp-config.php file with a text editor, and add the define lines here into the bottom of the file.


vim /home/user/public_html/wp-config.php

define( ‘WP_DEBUG’, true );
define(‘WP_DEBUG_LOG’, true);
define( ‘WP_DEBUG_DISPLAY’, false);

Make sure you either replace, or comment out define( ‘WP_DEBUG’, false );

Once you have this wp-config.php file saved you may have to create the accompanying debug.log file, and change the ownership on the file to your user. On the SSH bash syntax below replace ‘user’ with your actual username

touch /home/user/public_html/wp-content/debug.log
chown user. /home/user/public_html/wp-content/debug.log

Now we can watch the debug.log file as we load the site to see what is occurring when we attempt to load the site.

tail -f /home/user/public_html/wp-content/debug.log

[23-Mar-2019 18:15:03 UTC] PHP Fatal error: Uncaught Error: Call to undefined function mysql_error() in /home/plangisbetter/public_html/wp-content/plugins/revslider/inc_php/framework/db.class.php:29

In this case its a PHP fatal error due to undefined mysql_error() function with the revslider plugin. This function was removed in PHP 7.0 and newer, which we found with a quick google search. There are two solutions. Update the plugin to a newer version that supports php 7.0, and newer. Or change the php version of the site to php 5.5. I would recommend updating the plugin as PHP 5.5 no longer receives security updates.

If this helped you out consider subscribing on youtube, or following me on https://twitch.tv/djrunkie

Fix broken Grub2 on KVM Virtual Instance for CentOS 7 & Redhat

If your virtual instance is not booting due to a broken grub2 configuration you can fix it by connecting through your parent server with the sysrescuecd on the virtual instance.   

Here is a video showing this in action. https://youtu.be/9TOGb6cEhcY

This is what grub2 rescue screen looks like. If this is what you’re seeing then connect to your parent server, get a list of instances, stop the instance with the Unique ID that you’re working on, copy the configuration file, and then modify the copied configuration file to boot from the sysrescuecd iso file.

ssh root@parentserverlocation.com
virsh list
cp -p /xen/configs/E7PX0D{,.sysrescd}.cfg
vim /xen/configs/E7PX0D.sysrescd.cfg

On the OS block in the cfg file add the section for boot dev=cdrom:

   <os>
<type arch="x86_64" machine="pc-i440fx-2.2">hvm</type>
<boot dev='cdrom'/>
<boot dev="hd"/>
</os>

Then on the disk block in the cfg file add the section for source file=xen/images/systesmrescuecd-version.iso

 <disk type="file" device="cdrom">
<target dev="hdc" bus="ide"/>
<source file="/xen/images/systemrescuecd-x86-5.0.2.iso"/>
<readonly/>
</disk>

Make sure you upload the sysrescuecd to the parent server from your workstation.

scp systemrescuecd-x86-4.6.1.iso root@parentserver.address.com:/xen/images/systemrescuecd-x86-4.6.1.iso

Then stop the virtual instance, and restart it using the modified configuration file

virsh destroy E7PX0D
virsh create /xen/configs/E7PX0D.sysrescd.cfg

Now that you have the virtual instance started with the rescuecd you need to connect to it via a virtual tty. I will be posting an article for connecting via a virtual tty for a KVM instance in the future as it will require its own guide, once that is posted I will modify this post.

Once connect to the virtual TTY you need to find your virtual disks root partition, mount it, and then also mount the boot partition.

fdisk -l
mount /dev/vda3 /mnt/gentoo
mount /dev/vda1 /mnt/gentoo

Then we need to mount proc dev and sys to the root partition, and chroot into this root partition. Once it is mounted we need to recreate the grub.cfg file. If the Kernel is broken we need to bring up the eth0 interface and reinstall the Kernel.

for dir in proc dev sys; do mount --bind /$dir /mnt/gentoo/$dir; done
chroot /mnt/gentoo /bin/bash
grub2-mkconfig -o /boot/grub2/grub.cfg
ifup eth0
yum reinstall kernel

At this point we can shutdown the instance since the grub has been rebuilt, and boot the normal configuration on the parent server.

shutdown -h now
virsh create /xen/configs/E7PX0D.cfg

Now the instance should be back online in a few moments, and our work is done.

If you have a dedicated server that is down due to a broken grub2 then installing the sysrescuecd onto a USB drive, and starting from the fdisk -l command will work for that dedicated server as well.

If you this helped you out consider supporting me on youtube or https://twitch.tv/djrunkie

Linux MySQL – Secondary MySQL instance from backup data for the purpose of taking a mysqldump of a specific database

Do you have a copy of your MySQL directory but are unable to take a .sql dump of a specific database in order to restore it? You can start a secondary temporary mysql instance from this data in order to take a .sql dump of that database.

First you would create a directory to move the data in to so you can start the instance.

mkdir -p /home/temp/restore.mysql/mysql/

Then sync over the necessary data to start the instance. In this example I am taking the live data from my server, but if you have a backup server you would use the same format. The mysql dir, the ib* files, the performance_schema dir, and the database dir, which in this case is called disc4lif_wp669.

rsync -avHP /var/lib/mysql/mysql /var/lib/mysql/ib* /var/lib/mysql/performance_schema /var/lib/mysql/disc4lif_wp669 /home/temp/restore.mysql/mysql/

Once you have synced over the required data you will need to update the ownership of the temp directory, and the permissions, in order to start the secondary instance. Make sure you use absolute paths with this chown command so you don’t accidentally change the ownership on the wrong directory

chown -R mysql. /home/temp/restore.mysql/

chmod 751 /home/temp/restore.mysql/mysql/

Now we need to set a variable to this directory for easy configuration of the secondary instance.

dir=/home/temp/restore.mysql/mysql/

Now we can start the secondary instance using this variable. If you have innodb data you should likely start the secondary instance with –innodb-force-recovery=4. If its just myisam data you can remove this part of the configuration line.

mysqld --datadir=$dir --socket=$dir/socket.mysql --pid-file=$dir/mysql.pid --log-error=$dir/mysql.err --skip-grant-tables --skip-networking --innodb-force-recovery=4 --user=mysql &

The & symbol runs the program in the background so you can continue typing in your SSH session. If there are any issues they should be printed to the screen, or you can check the mysql.err file to see what occurred. For instance if you updated MySQL to say MySQL 5.7, and the data was from MySQL 5.6 this will fail, and you can’t start a MySQL 5.7 server from MySQL 5.6 data.

Now that we have the instance started we can create a dumps directory, and take a dump of the database from the secondary instance.

mkdir -p /home/temp/restore.mysql/mysql/dumps

mysqldump --socket=$dir/socket.mysql disc4lif_wp669 > disc4lif_wp669.sql

Confirm the dump completed as expected by checking the last line of the .sql file.

tail -1 disc4lif_wp669.sql
-- Dump completed on 2019-03-22 19:01:02

If there was an issue, and the database is stored in myisam storage engine, you can check the table with the issue using mysqlcheck. This command below would repair the wp_options table granted it was stored in mysiam.

mysqlcheck -r --socket=$dir/socket.mysql disc4lif_wp669 wp_options

Now that you repaired the table that was broken try to take the dump again. Now that you have a current dump from the secondary instance its time to stop the secondary instance.

mysqladmin -S $dir/socket.mysql shutdown

Now I would consider you take a current dump of the live data before restoring from the backup data.

mysqldump disc4lif_wp669 > disc4lif_wp669.sql.`date +\%Y\%m\%d_\%H\%M\%S`

Now you can restore the .sql file you took from the secondary instance.

mysql disc4lif_wp669 < disc4lif_wp669.sql

Here is a video showing this process in action. https://youtu.be/UChE0uPtH3k

That is it. If this helped you consider following me on twitch and youtube. https://twitch.tv/djrunkie

What is eating my disk space? Disk Usage & Inode usage Investigation on Redhat Linux server

Servers will run out of space, whether it be due to inode usage or actual disk space due to file sizes. Inodes are the amount of files that your disk can handle, while the disk space is how much actual space the disk capacity can contain.

Here are two different find commands to help investigate these issues. You should only be removing what you know is OK to remove, usually log files, old backups, or directories with millions of useless files due to some cron command that is running over and over. If it is the later where a cron command is causing the issue the cron command should be fixed after the directory is cleared. Also if you do find a directory with millions of files you may have to do multiple find commands to actually remove the files because the rm command won’t be able to handle the amount of arguments.

Here is the first command.

find / -type f ! -path "/home/virtfs/*" ! -path "/proc/*" ! -path "/run/*" ! -path "/sys/*" ! -path "/backup/*" -size +50M -exec ls -lh {} \; | awk '{print $4" "$5" "$6$7"\t"$8" "$9" "$10" "$11" "$12}'

This command above is looking for files larger than 50MB and prints them out, including the user of the file, and the location. You may want to run these commands in a screen session because these commands can often take hours to run on overloaded servers.

Here is the second command.

for drec in `find / -type d ! -path "/proc/*" ! -path "/run/*" ! -path "/sys/*" -size +140k`; do echo $drec >> /home/inodes.txt &&echo "Expected files for ~8KB/File" >> /home/inodes.txt && stat $drec | grep Size | awk '{print $4*7}' >> /home/inodes.txt && echo "Actual files" >> /home/inodes.txt && find $drec -type f | wc -l >> /home/inodes.txt && echo -e "\n" >> /home/inodes.txt ; done

The second command runs a for loop which prints out directories over 140KB in size to a text file /home/inodes.txt and the amount of files in those directories. This is extremely useful for finding directories that are taking up all the inode usage, such as email directories. Usually these directories when they house millions of files will be hundreds of GB in size as well, which makes sense if you do the math, 1 million * 8KB a file is 8GB of space used. Also 8kB is on the small side of a file size.

Both of these commands are completely safe to run. Make sure you are competent when clearing or removing large files / amounts of files.

Here is my youtube video showing these commands in action.

https://youtu.be/dqJiDx6DwwA

Consider supporting me on twitch if you found this useful.
https://twitch.tv/djrunkie

Fix simple 500 permission error on your website with Apache

If you are getting a 500 error on your website then checking your IP address in the Apache error log is the usual method of figuring out what is wrong. On a Cpanel / WHM server running Apache with Red Hat 7 the error log is located at /etc/apache2/logs/error_log . Using the linux string matching command grep we can search for our IP address in the log files. This is after receiving the error on the website. Remember you have to be searching this on the correct server. If you’re not sure which server your website is on you need to check the IP of your website. If your site is hosted using a CDN such as cloudflare then you would have to login to the cloudflare DNS page to check what IP address the site is directing to.

Using grep on our IP in the apache error log we found a 500 error saying ensure that /home/disc4lif/public_html is readable and executable. Doing a stat command on this directory reveals that the permissions are 000 which is no access. Using chmod we can change the permissions to what they should be for Apache on a public_html, which is 750. The directories under public_html should generally have 755 permissions.

There could be other issues as well if the directory was owned by the root user. If that was the case they we would need to use the chown command to change the public_html ownership / group.

chown disc4lif.nobody /home/disc4lif/public_html

After fixing the permissions, or ownership, revisit the site to ensure its working as expected. If there are continued issues recheck the error log to see what the new problem is.

If you found this useful consider supporting me at https://twitch.tv/djrunkie . I will be posting more useful, and advanced articles in the future.

Here is a video guide as well: https://youtu.be/PEFpd0b4sXY

Fix Forgotten or Broken renamed WordPress login URL

If you have forgot the wordpress login URL because you renamed it using a plugin, such as rename-wp-login, then you can resolve the issue by changing the login URL back to default for the time being.

First you will need to SSH into your server, and then move the plugin directory with the _ character to disable it. This works on all plugins. Just remember after you move the plugin directory in order to get access to the wp-login.php URL you need to clear your browsers cache, which is ctrl + shift + delete in chrome.

After you have moved the plugin, and cleared your cache the login url should work on the default wp-login.php


Now I would recommend renaming the plugin back to its default name, re-activating the plugin, and updating the login URL again. This is important because it will prevent most bots from accessing your login page, and trying to login, which is a very common vector of attack for wordpress sites.

If you found this useful consider supporting me at https://twitch.tv/djrunkie . I will be posting more useful, and advanced articles in the future.

Here is a video guide as well: https://www.youtube.com/watch?v=nivw9Z73Ljs